


Deck shades can provide you with an ample amount of shade, but it also has the added benefit of heating your backyard. Deck shades are perfect for those who feel like their house is not providing enough protection from the sun’s harmful UV rays. Deck shades are inexpensive and easy to install on your own.
Another Interesting Read: 7 Rose Garden Ideas For Rose Lovers
Here are 5 ideas that will help you create your deck shade in your backyard.
Table of Contents
1. Deck Shade Sail
Materials Needed – Canvas drop cloth, scissors, staple gun, twine or rope, 2 x 2 lumber (optional)
Instructions
Deck shade sails are perfect for those who want to spend less money on materials. Deck shade sails are inexpensive, easy to install, and can be removed during the winter months so you don’t have to worry about storing them. A deck shade sail protects against harsh UV rays but also allows enough sunlight to pass through so your backyard doesn’t have to be in complete darkness. You can also decide on your color scheme so deck shade sails are perfect for those who want more design control over their deck shade.
Step 1
Measure the dimensions of your backyard, then cut out a tarp that is 10 inches longer than the height of your backyard and 50% longer than its width. Make sure you check the direction of the fabric’s weave so that it will be easier to fold later.
Step 2
Pull both ends of the tarp and staple them down to secure them in place. Make sure you pull the fabric tight before stapling it down, this way there won’t be any slack or lose edges. If you want to be able to disassemble your deck shade, then you can use 2 x 2 lumber as a frame for the tarp.
Step 3
Secure the flap down with twine or rope, and test out your new DIY sunshade.
2. Deck A-Frame Shade
Materials Needed – (2) 2 x 3 boards (at least 8ft in length), (4) 2 x 4 boards (at least 6 ft in length), Deck screws, Deck stain or paint
Instructions
Deck A-Frame Shade can be adjusted to provide your backyard with all kinds of different amounts of shade. This type of deck shade is perfect for those who have a lot of outdoor activities or just need more protection from the sun’s harmful UV rays. It also provides enough airflow so this deck shade is perfect for those who want their backyard to not feel suffocated by its own furniture and designs.
Step 1
Run a string between two points across your backyard. Make sure these two points are spaced far enough apart so Deck A-Frame Shade can be properly installed.
Step 2
Snap a chalk line diagonally across the string and make sure Deck A-Frame Shade is running perpendicular to it. Make sure Deck A-Frame Shade rests on top of Deck A-Frame Shade so that when you are finished, it will create an A shape in your backyard.
Step 3
Drive screws through all four corners of Deck A-Frame Shade so that the structure holds together tightly. Then stain or paint Deck A-Frame Deck before installing it in your backyard for added protection from the elements.
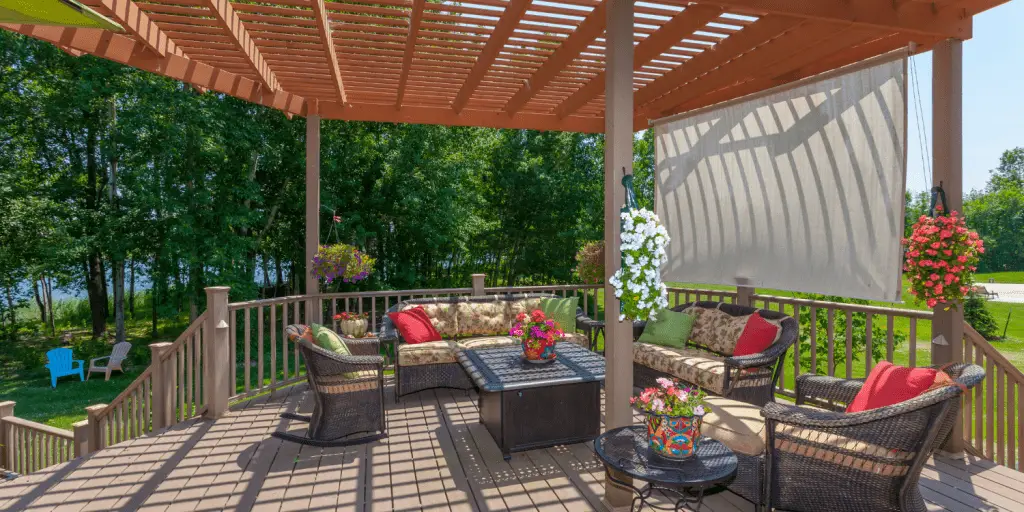
3. DIY Pergola Sunshade
Materials Needed – Deck boards, Deck screws, Lumber (for structural strength), Trim boards (optional), Deck stain or paint
Instructions
Pergolas are perfect for those who want shade without having to deal with a canopy. It has a design that is similar to Deck A-Frame Deck, but instead of providing shade from the top Deck Pergola provides shade from the bottom and allows enough sunlight to pass through so Deck Pergola doesn’t feel suffocating in your backyard. A pergola also helps make a great backdrop for plants and flowers in your garden.
Step 1
Layout Deck boards across Deck Pergola’s length and space them 12 inches apart. Make sure you adjust this spacing depending on how much privacy you need since spacing these boards further apart will provide more privacy, but less shade protection. To make the Deck Pergola more sturdy, you can also use Deck boards to create your structural frame.
Step 2
Screw Deck boards together so that Deck Pergola holds together tightly. You can also opt to use lumber as a frame for Deck Pergola if you want it to be a bit sturdier. Deck board spacing shouldn’t exceed 16 inches apart so the structure can stay strong and not require extra support from lumber or trim boards around the edges of the Deck Pergola.
Step 3
Stain or paint Deck Pergola before installing it in your backyard using Deck screws for added protection from the elements. Then simply fill Deck Pergola with pillows and other furniture pieces you already have on your patio, yard, or garden. Deck Pergola can also be used as a backdrop for your flowers and plants.
4. DIY Patio Umbrella Shade
Materials Needed – (1) Deck board, Deck screws
Instructions
This type of shade is perfect for those who want to sit outside and read or work on their laptop since it provides enough shade to keep you cool, but not so much where Deck Umbrella Shade feels suffocating and hot. It’s also great if you just don’t have room for other deck furniture like Deck A-Frame Deck or Deck Pergola in your yard because Deck Umbrella Shade installs directly onto your existing patio umbrella without needing any extra installation into the ground.
Step 1
Locate where Deck Umbrella Deck should be installed and screw Deck board into place. Deck Umbrella Shade runs parallel to Deck Umbrella Deck and will provide just enough shade to block out the sun without making your backyard feel suffocated.
Step 2
Deck Umbrella Deck can be stained or painted and then simply installed onto your existing patio umbrella. Deck Umbrella Deck should also be thin enough that it fits under the lowest Deck Umbrella Shade rung so you don’t feel like Deck Umbrella Deck is getting in your way when it’s open.

5. DIY Side-Mounted Deck Curtains
Materials Needed – (2) Deck boards, Deck screws
Instructions
Covering up one side of your deck is a quick and easy way to add privacy while adding shade protection on the other side of Deck Side-Mounted Deck Curtains. This type of shade also works great if you have an existing outdoor canopy that’s already saving you some space in your yard since Deck Side-Mounted Deck Curtains can simply attach to it using Deck screws and then run along with Deck Side-Mounted Deck Curtains.
Step 1
Layout Deck boards around where Deck Side-Mounted Deck Curtains will attach to your existing outdoor canopy, patio cover, or other deck furniture. Make sure the spacing is appropriate since Deck Boards should be 12 inches apart so Deck Side-Mounted Deck Curtains can provide just the right amount of shade without feeling suffocating at Deck Side-Mounted Deck Curtains.
Step 2
Screw Deck Board into place using Deck screws so that it creates a wall for your Outdoor Canopy or Deck Furniture you already have installed in your backyard. You can also opt to use lumber as a frame for your Outdoor Canopy if you want it to be much sturdier and able to stand up against the wind. Deck Board spacing shouldn’t exceed 16 inches apart so Deck Side-Mounted Deck Curtains don’t become too flimsy and hard to work with.
Step 3
Deck Side-Mounted Deck Curtains can be made out of sheer fabrics, decorative curtains or solid fabric depending on how much privacy you need since spacing these boards further apart will provide more privacy at Deck Side-Mounted Deck Curtains but less shade protection. If you’re using sheer fabrics, Plexi Glass Panels over Deck Side-Mounted Deck Curtains is recommended due to its transparency that still allows for some light inside your deck area while keeping unwanted insects like mosquitoes away from where you are at Deck Side-Mounted Deck Curtains. Deck Side-Mounted Deck Curtains can even be used as dividers for Deck Deck Dividers if you already own Vertical Deck Dividers.
Conclusion
Although you might think your deck is perfectly fine without it, adding some type of shade cover like Deck Umbrella Shade, Deck Umbrella Deck, or even simply installing Outdoor Canopy can save you a lot of money in the long run (and shade cover) since you won’t have to move into an air-conditioned room just to enjoy your outdoor time after working in the yard for too long.
You might be interested in: