
Having a vegetable patch can help you with saving money and getting you personal and close to the natural world. Because the plants are so inexpensive, buying just one or two can save you money (for example, $3 to $5 per plant might produce around ten pounds of tomatoes in a season, which may easily cost $20 or more). Saving money on tomato plants and other favorite veggies or herbs from seeds is even more possible. You’ll also discover that garden-grown produce tastes and feels better than grocery-store produce. Plus, caring for your vegetable patch is about as exercise as it gets! Give your vegetable patch a great start with this advice and ideas.
Table of Contents
Increase the amount of what you enjoy to eat
What do you like to eat? What you tell others will reveal what type of vegetable patch you should have. When deciding what to grow, there are a few more factors to consider.
Be choosy about the types of plant seeds
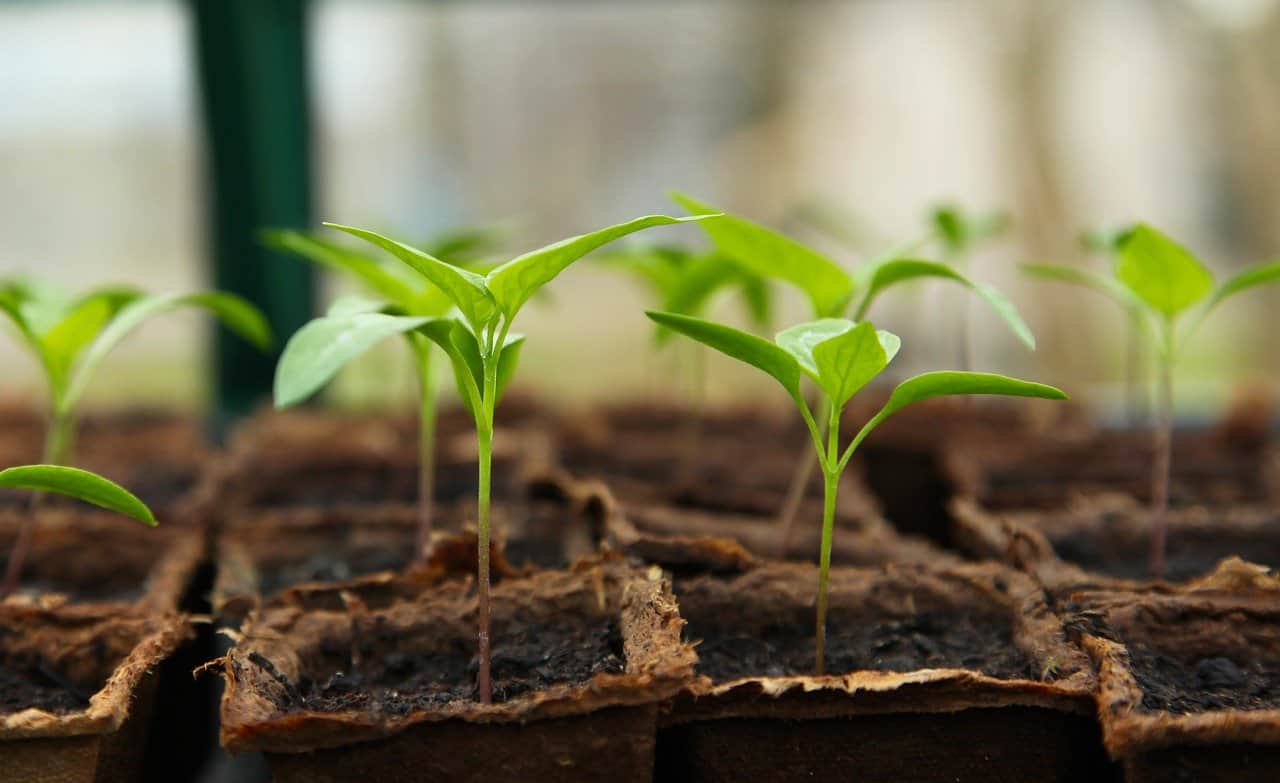
Take note of the seed’s description, tag, or label. Every vegetable variety has its own set of properties. Some crops produce smaller plants that are perfect for pots or small gardens. Many types of asparagus are available, each with its own set of benefits. For example, some varieties have greater disease resistance, higher yields, or superior heat- or cold tolerance. Choose veggies you enjoy eating and research their sizes and requirements for care.
Efficiency of a vegetable patch
Consider how much food you will consume on whole, as well as what is the possibility that you can freeze or give away extra fruits and veggies. Then think about the number of seeds or plants you’ll need to put in the ground. (Many novices make the mistake of planting too many seeds.) Vegetables continue to provide over the entire season, so you can get by with a small number of plants. Carrots, radishes, and corn are examples of other vegetables that can be only be harvested once and then replanted in a vegetable patch.
Crops After Each Other
Planting both cold and hot weather veggies will result in a continual harvest of vegetables in a vegetable patch, Herbs throughout the summer, spring, and fall. At the beginning of spring, sow green (such as arugula), carrots, lettuce, peas, radishes, and broccoli. Plant peppers, peppers, eggplant, and herbs after you’ve harvested your cold-weather crops. You can harvest potatoes, cabbage, and kale in the fall.
If you’re looking to grow edible plants in an area where vertical growth is limited, try vertical crops like peas and green beans.
Selecting the Site for Your Garden
Water and light are the two most important factors for successful gardening, regardless of which location you choose for your garden or what have you decided to grow.
A lot of sunlight is required.
Vegetables, like all plants, require sunshine to start photosynthesis. Fast-growing vegetables need a lot of sunlight (at least six to eight hours of direct sun) without interference from trees, shrubs, or fences. That’s why you won’t be able to grow sun-loving veggies in shaded areas. Plant vegetables and herbs in your vegetable patch that can withstand shaded conditions, such as kale, spinach, lettuce, chard, chives, parsley, cilantro, and thyme. Carrots, radishes, and beets might also grow in containers if your location receives at least 4 hours of direct sunshine per day. Alternatively, try container gardening if you have a sunny patio. You may put sun-loving veggies such as cucumber, basil, tomatoes, beans, dill, and rosemary in pots on your patio to
Consider how close you are to a water source.
The closer your vegetable patch is to a water source, the better. After seeds germination, the first few weeks or when the seeds are transplanted will be critical for these delicate plants to develop sturdy roots and stems if you can’t water them regularly. If you don’t have a lot of rain, water your plants once or twice each week rather than every day. Then the water will go deeper into the soil, encouraging roots to develop further, where they’ll be better equipped to obtain nutrients. Install drip irrigation or soaker hoses on a timer to help you save water and time by water.
Layout Your Vegetable Patch
When it comes to setting up your vegetable patch, choose either intensive or row cropping.
Crop rows
Plant seedlings in rows, at least 18 inches apart, for easy passage between them. Because rows make it simpler to apply mechanical equipment like tillers, to eliminate weeds, this technique works best for a large vegetable patch. The disadvantage is that the amount of vegetables you may plant is limited by the space given for footpaths.
Tall plants thrive on the north side of a garden, while short ones do better on the south. Tomatoes and plants that can be grown on vertical supports, such as peas, cucumbers, and planting beans, are examples of crops that require tall trellises. Make your A-frame trellis for vegetables to save money.
Shorthand for intensive cropping
Intensive cropping, also known as wide row gardening, helps you improve your garden’s productivity by spacing two or three plants close together in a bed about 4 feet wide. When planting heirloom vegetables, many gardeners prefer to use this method: the leaves of the seedlings or transplants are placed so that they barely touch at maturity. For most types of veggies, except vines (such as cucumbers), this technique works well because it utilizes almost every square inch of prepared soil. The disadvantage of this technique is that it requires hand weeding because the plants are so close together.
The square-foot method, which involves dividing a 4×4-foot raised garden bed into 1-foot squares with a physical grid is a more intensive form of cropping. You’ll need 8 cubic feet of top-quality vegetable patch soil to fill a 6-inch-high bed with 6-inch-high sides. The planting design is straightforward: 1 extra-large plant per 1x1foot square; 4 big plants per square; 9 medium plants per square; and 16 tiny plants per square.
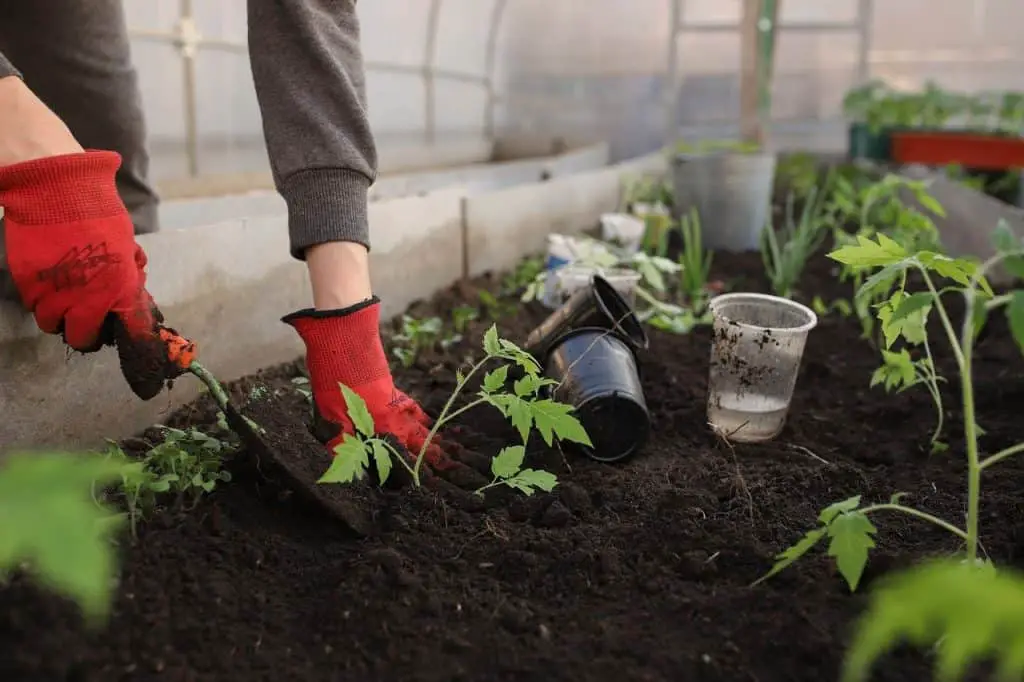
Plant Seeds in a Good Soil
Your vegetable patch will produce the best crop if it is grown in the finest soil possible. You know it when you touch it: It’s simple to dig and readily drains. Put a shovelful in your hands and pick up another. Is it gritty? Is there too much sand? Is it powdery? Is it sticky when wet? Too much clay? The texture of your garden soil is determined by a combination of these three kinds, as well as their proportions. Drainage and nutrient availability are both affected by the texture.
Soil that is dark, crumbly, and alive with activity is what you’re looking for. Fortunately, no matter what the texture is, all soil may be improved over time by adding organic matter to it. Consider sandy soils as an example. Sand is a type of soil that allows water and nutrients to flow through gaps quite readily. Organic matter (often compost) can help fill in the gaps between sand particles, which helps retain both nutrients and moisture for plants to consume.
Clay soils, on the other hand, are quite different. They have tiny, densely packed particles that hold water but provide little room for plant roots. Compost aids in the removal of tiny clay particles, allowing water to drain more freely and providing oxygen to plant roots. If you’re not sure what soil you have, test a sample at a state-approved soil testing laboratory.
Spread any necessary amendments such as compost and work them into the soil with a spade or tiller before planting to prepare it. Stepping on freshly tilled earth will compact it, undoing all your hard work. Water thoroughly after raking the surface smooth. Allow several days for the soil amendments to work before planting to allow the bed to rest.